Red Chile Beef

I thought I’d give you the low down on creating/adapting recipes by telling you my experience on this one. I should give a disclaimer that the pictures here are not from the recipe I actually ended up with. I’ll take new pictures and replace these….maybe. We’ll see how the day goes. (I just couldn’t stand not having new pics up, and the little one is napping..yippee!…so the picture above the recipe is the current picture of the actual recipe. The old picture is at the end, in case you’re interested in comparing the difference. Enjoy!)

I wanted a good beef recipe for Cinco de Mayo. One of my favorite dishes to order when we go out for Mexican is a shredded beef chimi. I’ve had them all sorts of ways, and generally, it’s mildly spiced shredded beef, sometimes with a few onions or tomatoes thrown in. What I always want is something with a sauce with some spice and flavor to compliment the beef, so I usually get it enchilada style, but I would love a plain chimi, with a red chile sauce mixed with the beef. So, I decided to find a recipe I could make myself. I wanted something that could be thrown in the slow cooker, and cook all day. I looked at several recipes, came up with a traditional flavor profile I like for the sauce (red chile base, with some garlic and cumin), and decided to make the sauce, and throw it all in the slow cooker. That’s what the pictures are of. The problem I ran into is that the roast creates too much liquid and fat. It results in a roast that is swimming in a liquidy, oily broth that mildly tastes like chiles.

Hmmm. I realized that the only two options I could come up with were 1. use a very lean cut of meat, and sacrifice flavor or 2. make the sauce separately, cooking the roast plain, then adding the sauce after the roast is cooked. I decided on the latter. One benefit of this method is that you can make the sauce the day before, or any time during the day. Another benefit is that you can set aside some of the plain beef for your picky eaters who don’t like the sauce. The final result is exactly what I wanted, a mild flavorful red chile shredded beef. I can’t wait to make chimis!

RED CHILE BEEF

3 pound boneless chuck roast
1/2 cup beef stock
3 ounces (about 12) dried new mexico chiles
1 TBS olive oil
3 cloves of garlic, minced
1/4 tsp cumin
1/4 tsp salt

Place roast and beef stock in slow cooker and cook on low 6-8 hours, until tender and falling apart.

For the sauce: fill a medium pot 2/3 with water. Remove the stems and seeds from the dried chiles. Add the chiles to the water, turn the heat to high and bring to a boil. Remove from heat and place a small plate on the chiles to keep them under the water. Cover the pot and let sit for 30 minutes. Place the chiles in a food processor or blender along with 1/2 cup of the soaking water. Blend until smooth. Press the mixture through a fine-mesh strainer to remove any seeds and remaining tough skins. In a pan, heat olive oil over medium heat. Add minced garlic and cook until it just starts to brown, about one minute. Add chile puree, cumin, and salt. Cook, while stirring, for one minute. Remove from heat.

When roast is done cooking, drain the liquid into a bowl and return roast to slow cooker. Pull the beef apart with two forks, removing any big chunks of fat or gristle. Mix 1/4 cup of the juices from the beef into the (warm) red chile sauce and pour over the beef, stirring to coat. Serve or keep on “warm” or “low” setting until ready to serve. Use this beef in enchiladas, tacos, burros or chimis, or serve with fresh tortillas and beans.

REAL food alert: check your beef stock for MSG and additives.

printable version

The New Picture

The Old Picture.

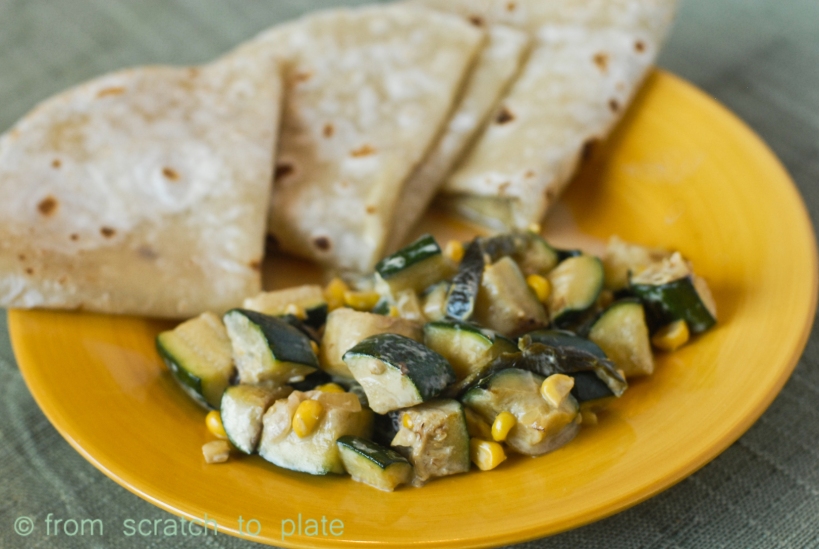
Calabacitas con Crema (Zucchini with Cream)

There’s a song I learned in my 7th grade Spanish class. Here’s how I remember it (starting from the part I can recall): “cinco de mayo, seis de junio, siete de julio, San Fermin. La, La, La, La, La, La, La. Hien a roto la pagareta. La, La, La, La, La, La, La. Hien a roto la pagara.” I sang this for my Brother-in-law once, who is fluent in Spanish, and he looked at me like I was crazy. After messing around with google translate, I’m pretty sure “hien” should be “quien”, but I am still pretty sure somewhere since 7th grade, the song has become warped. We called this the “Smurf Song”…you can guess why. I still sing it today (incorrectly)…every time I hear the words “Cinco de Mayo”. I live in the American Southwest, so Cinco de Mayo is a pretty big deal. We eat Mexican food on a weekly (sometimes daily) basis, but I still love to have a little themed dinner on May 5th, just for funsies. This particular dish is one of my favorites. It takes some prep, but it’s sooooo worth it. Plus, it’s fairly healthy to offset the refried beans, rich meat and stacks of tortillas that is normal Mexican fare. Try it for your Cinco de Mayo dinner this year! It’s perfect with soft tortillas, Garlic Pork Roast and Roasted Red Salsa.

CALABACITAS CON CREMA

2 ears of corn
1 large poblano chile
1 pound zucchini or mexican squash
1/2 tsp salt
1 TBS butter
1 TBS olive oil
1/2 medium sweet onion, sliced into thin strips
2/3 cup heavy cream

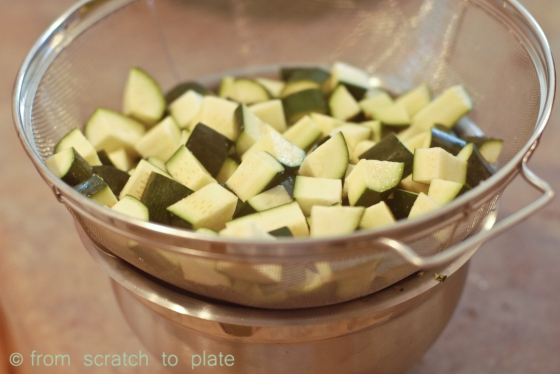
Preheat oven to 350 degrees. On a cookie sheet, place 2 ears of corn, still in their husks and poblano chili. Place in the preheated oven. Cook for 30 minutes, turning chili as needed to get a nice blister on each side. The blacker the skin, the better. While corn and chile are cooking, dice zucchini into 1/2 inch cubes. Toss the zucchini in salt and place in a colander. Put the colander in a larger bowl or over the sink or a towel to catch drips. The salt will draw out moisture, which you want to drain off. Let sit for 30 minutes, then dry zucchini on paper towels. Sometimes I have gotten 1/2 cup of liquid, and sometimes only a few tablespoons. Either way, I’ve noticed a difference in the texture of the zucchini after it’s cooked. Cut onion into thin strips. When corn and chile are done cooking, allow to cool, about 15 minutes. Take a paper towel and rub the chile, removing the blistered skin. The blacker the skin, the easier it is to come off. You may want to wear disposable gloves while you do this, as chile oil does not wash off easily and you will be in pain if you touch your eyes after the chile. Pull off the cap on top and any seeds that come with it. Cut open on side of the chile and flatten it out. remove any seeds and discard. Slice the chile into thin strips. Remove the husk from the corn and cut the kernels off.

When the zucchini, chiles, onion and corn are all prepped and ready, Heat oil and butter in a pan over medium heat. And the zucchini and fry, stirring frequently, until brown and just tender (cooked, but not mushy). Remove the zucchini to a plate, retaining as much oil and butter in the pan as possible. If the pan is dry, add another TBS of oil and wait for it to come up to heat before continuing. Add the corn, onion and chile to the pan and stir-fry until onions are soft and brown. Add the zucchini back in to the pan along with the cream. Heat until the cream glazes the vegetables. Remove from heat and serve immediately. If you don’t plan to serve immediately, after the veggies are cooked, combine with the zucchini and let rest. Right before serving, add cream and heat over medium until cream reduces to a glaze, about 3-5 minutes. This tastes best if made and served immediately, so I would suggest you do all the prep work beforehand, then leave this to be your last dish cooked.

printable version

Adapted from a recipe by Rick Bayless.